Deploy Your Own Webhook with ngrok
Step-by-step guide to deploying a Token Vault webhook server locally using Docker and ngrok, binding it to your vault, and storing your first credential.
This guide walks you through deploying the reference Token Vault webhook server on your local machine, exposing it via ngrok, and binding it to your Token Vault account. By the end you will have a fully working Webhook Mode vault where Token Vault never sees your credentials.
What you're building
In Webhook Mode, your credentials are stored on your own server. Token Vault acts as a metadata, policy, and authorization layer only. Your webhook optionally encrypts credentials with its own AES-256-GCM key and handles all decryption locally. See Webhook Mode for the full architecture.
Prerequisites
Before starting, you need:
- ngrok account with a static domain allocated (free tier works fine) and your
NGROK_AUTHTOKENcopied from the ngrok dashboard - Docker installed and running
- A Token Vault account at tokenvault.uk (sign in with Google, free)
ngrok static domain required
You need a static domain (e.g., your-name.ngrok-free.app) so your webhook URL stays the same across restarts. Without a static domain, Token Vault will lose contact with your webhook every time the tunnel restarts.
1. Clone the Webhook Example
The reference webhook implementation lives in the tvault repository. Clone it and navigate to the example:
git clone https://github.com/c-lgrant/tvault.git
cd tvault/examples/webhook-ngrok
2. Build the Docker Image
docker build -t tv-webhook .This creates a lightweight Python image with FastAPI, gunicorn, and ngrok bundled together.
3. Start the Webhook
Run the container with your ngrok credentials and a persistent volume for data:
docker run -d \
  -e NGROK_AUTHTOKEN=your_ngrok_token \
  -e NGROK_URL=your-domain.ngrok-free.app \
  -v tv-webhook-data:/data \
  -p 8080:8080 \
tv-webhook| Variable | Purpose |
|---|---|
NGROK_AUTHTOKEN | Authenticates with ngrok to create the tunnel |
NGROK_URL | Your static ngrok domain (without https://) |
-v tv-webhook-data:/data | Persists encryption keys and tokens across restarts |
On first startup the webhook automatically generates:
- A 256-bit HMAC secret for authenticating requests from Token Vault
- An AES-256-GCM encryption key for encrypting stored credentials (optional — see note below)
Encryption is optional
The reference webhook generates an encryption key by default, but encryption is entirely your choice. Token Vault does not require or verify that credentials are encrypted on your webhook. If you build a custom webhook, you can store credentials in plaintext — the security boundary is your webhook itself. Encryption at rest is recommended for production use.
Check that the webhook started successfully:
docker logs $(docker ps -q --filter ancestor=tv-webhook) | tail -5You should see a message like:
WEBHOOK NOT CONFIGURED
Please open https://your-domain.ngrok-free.app/bind in your browser
4. Open the Bind Page
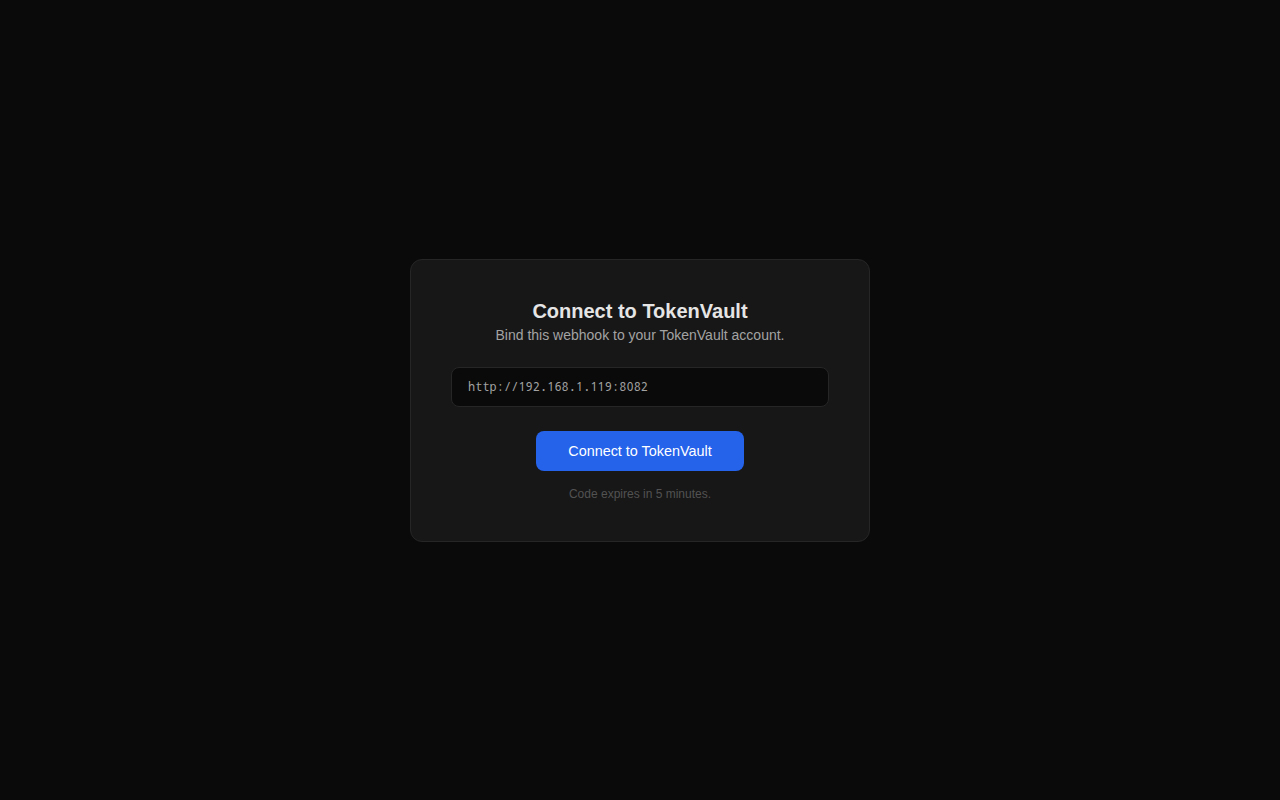
Open your webhook's /bind URL in a browser:
https://your-domain.ngrok-free.app/bindYou will see a card showing your webhook's public URL and a Connect to TokenVault button. The one-time registration code expires in 5 minutes.
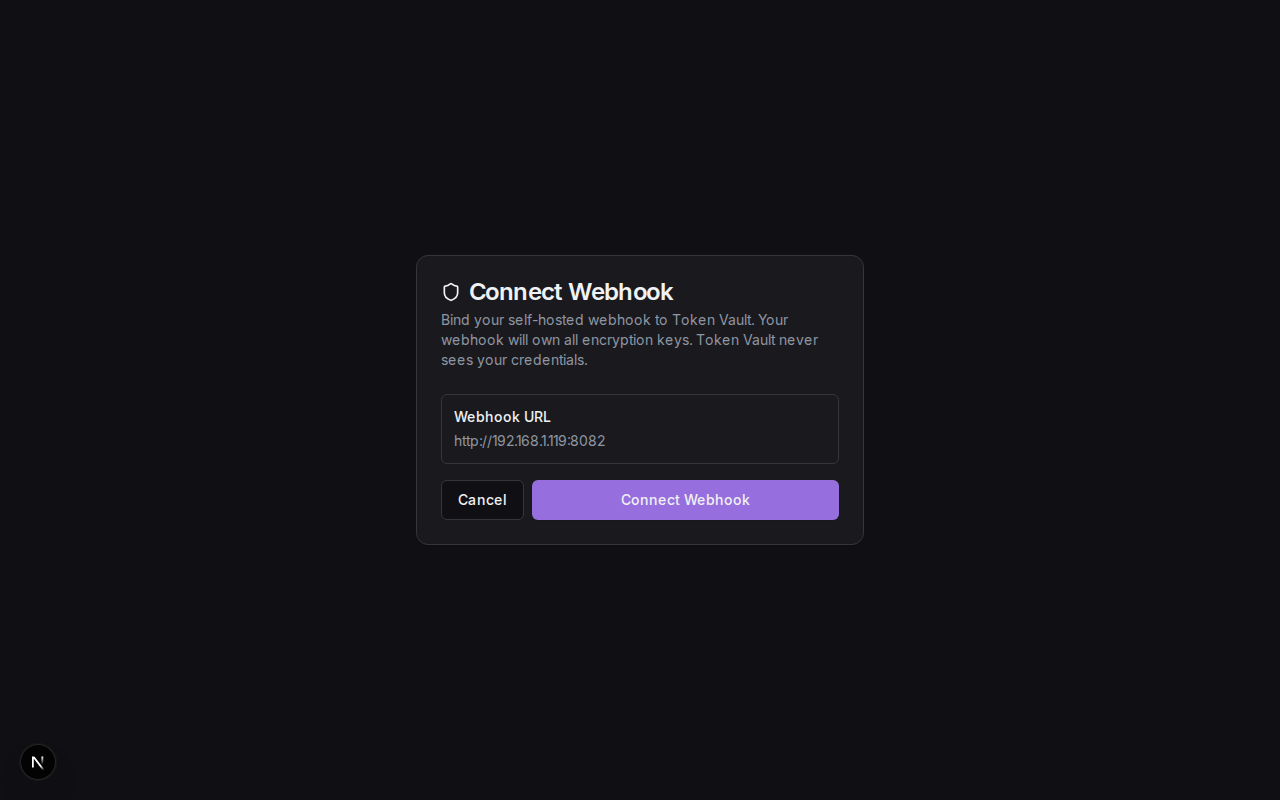
5. Connect to Token Vault
Click Connect to TokenVault. Your browser redirects to Token Vault's webhook-bind page. Review the webhook URL and click Connect Webhook.
Behind the scenes, Token Vault calls your webhook's /v1/exchange endpoint with the one-time code. Your webhook validates the code and returns the HMAC secret. Both sides now share a secret for authenticating all future requests.
After a successful exchange Token Vault runs a health check on your webhook and shows a success message. You are then redirected to your dashboard.
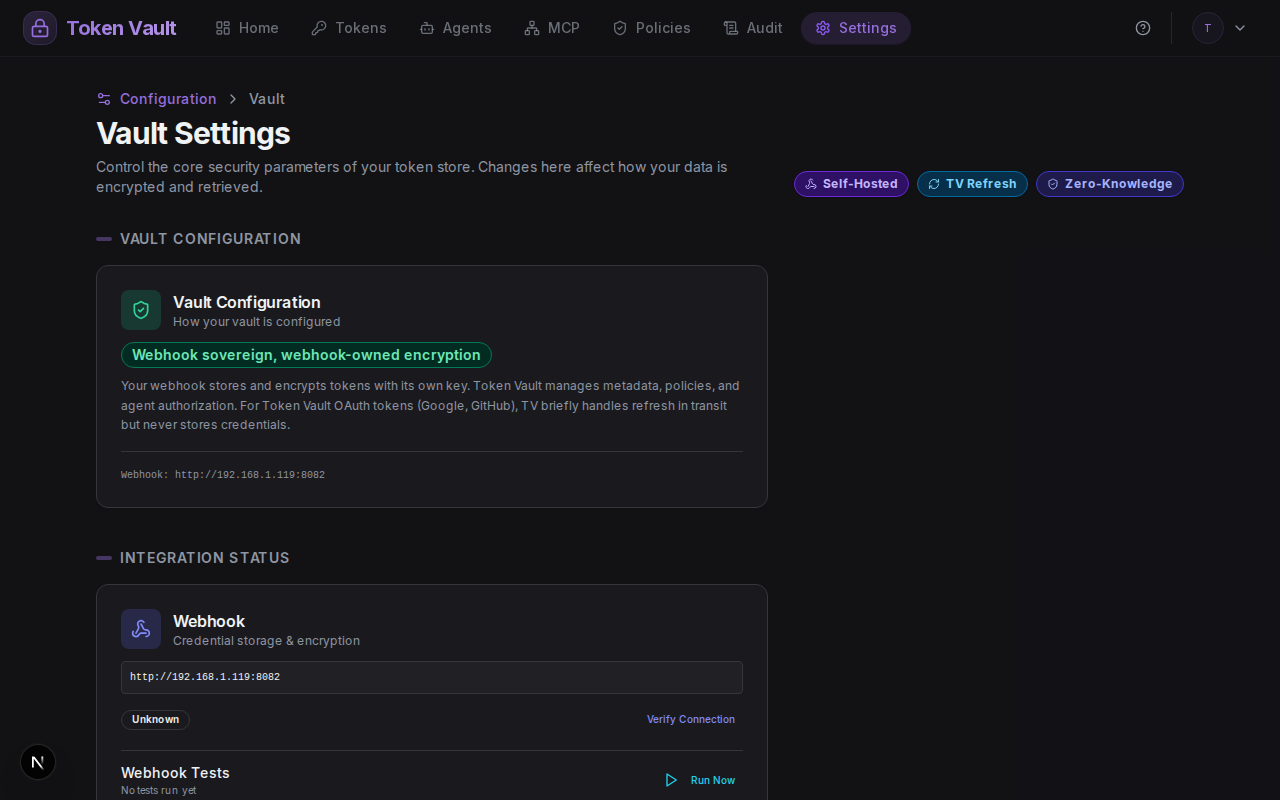
6. Verify the Connection
Go to Settings > Vault to confirm your webhook is connected. You should see the vault mode set to Webhook Sovereign with a healthy status.
You can also verify from the command line:
curl -s https://your-domain.ngrok-free.app/v1/health | python3 -m json.tool{
"status": "healthy",
"version": "2.0.0",
"keyConfigured": true,
"capabilities": ["store", "credential", "proxy", "refresh", "tv-refresh", "storage"],
"uptime": 3600,
"tokenCount": 0
}7. Add Your First Token
Go to Tokens on the dashboard and click Add Custom Token. Enter a service name (e.g., "GitHub") and paste your API key or personal access token.
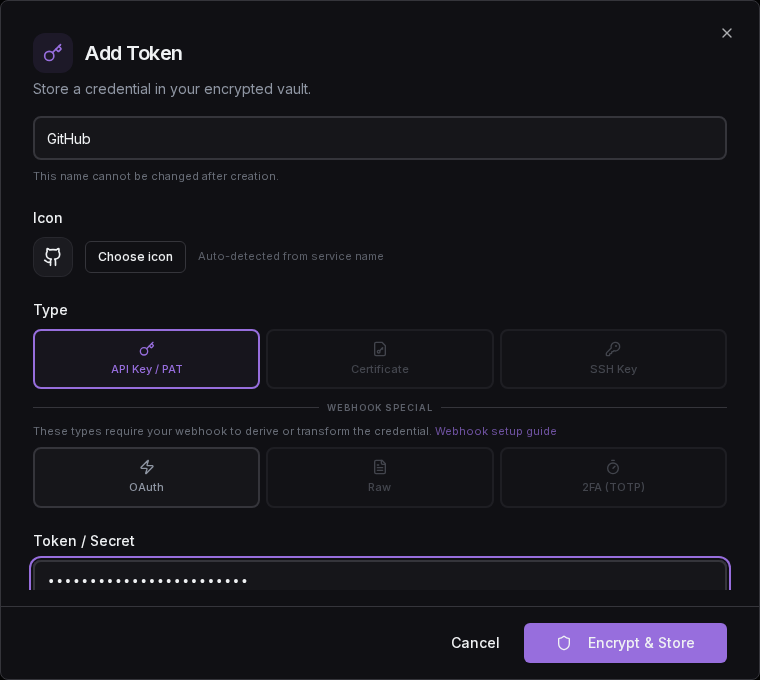
When you click Encrypt & Store, the credential goes directly from your browser to your webhook. Token Vault issues a signed store ticket but never sees the credential. Your webhook encrypts it with its own key and persists it to disk.
8. Use With an Agent
Create an agent on the Agents page, grant it access to the token you just stored, and use the agent API key to retrieve credentials:
curl -L -H "Authorization: Bearer tvagent_your_key_here" \
  "https://api.tokenvault.uk/api/agents/credentials?service=github"
Token Vault validates the API key, checks grants and ABAC policies, then returns a 307 redirect to your webhook's /v1/credential endpoint. The agent follows the redirect and gets the credential directly from your webhook. Token Vault never touches it.
Architecture Summary
Environment Variables
The full set of environment variables accepted by the reference webhook:
| Variable | Required | Default | Description |
|---|---|---|---|
NGROK_AUTHTOKEN | Yes (Docker) | — | ngrok authentication token |
NGROK_URL | Yes (Docker) | — | Your ngrok static domain |
PORT | No | 8080 | Server port |
WEBHOOK_EXTERNAL_URL | No | Auto-detected | Public URL (auto-detected from ngrok headers) |
TOKENVAULT_FRONTEND_URL | No | https://tokenvault.uk | Token Vault frontend URL |
TOKENVAULT_STORE_PATH | No | /data/tokenvault_store.json | Path to persist webhook config |
TOKENVAULT_KV_STORE_PATH | No | /data/tokenvault_kv_store.json | Path to persist token data |
LOG_LEVEL | No | DEBUG | Logging level |
Persistent Storage
The webhook persists two JSON files (in /data/ by default):
tokenvault_store.json— HMAC secret, encryption key (if enabled), webhook IDtokenvault_kv_store.json— Encrypted (or plaintext) tokens, proxy configs, audit events
Mount a Docker volume (-v tv-webhook-data:/data) to keep data across container restarts.
Build Your Own
The reference webhook is one implementation. You can build your own in any language or framework. Token Vault publishes a complete machine-readable specification at tokenvault.uk/llm.txt. Feed it to an LLM with your preferred stack:
curl -s https://tokenvault.uk/llm.txt | pbcopyGenerate a Token Vault webhook server in Go using Gin. Include all endpoints, HMAC verification, ticket verification, and a SQLite storage backend.
Encryption is your choice
When building a custom webhook, encryption at rest is optional. Store credentials in plaintext or encrypted — Token Vault does not enforce either approach. The spec at llm.txt documents both the plaintext and encrypted token document formats.
Troubleshooting
Webhook not reachable
If Token Vault cannot reach your webhook:
- Verify the ngrok tunnel is running:
curl https://your-domain.ngrok-free.app/v1/health - Check Docker logs:
docker logs $(docker ps -q --filter ancestor=tv-webhook) - Ensure your ngrok static domain matches
NGROK_URL
Exchange code expired
The one-time code from the /bind page expires after 5 minutes. Visit /bind again to generate a fresh code.
HMAC signature invalid (401)
The HMAC secret is out of sync. Re-bind by visiting your webhook's /bind page and connecting again.
Tokens not persisting across restarts
Ensure you mounted a Docker volume with -v tv-webhook-data:/data. Without a volume, data is lost when the container stops.
Upgrading the Webhook
The reference webhook ships with a built-in GitHub Actions workflow ("Update webhook") that keeps your deployment up to date. When triggered, it opens a pull request on your repository that overlays the latest upstream release onto your deployment — adding new files and updating changed ones, but never touching your wrangler.toml, secrets, or any configuration you have customised.
Schema migrations (new storage collections, new document fields) apply automatically on boot, so an in-place redeploy preserves the webhook's sealed identity. You do not need to re-key or change your webhook URL when upgrading.
The full upgrade guide, including instructions for the GitHub Action and manual upgrade steps, lives at deploy/cloudflare/UPGRADING.md in the public c-lgrant/tvault repository.
Next Steps
Webhook Protocol Reference
Detailed endpoint schemas, authentication, and error codes for the full webhook integration.
Create an Agent
Give AI agents scoped, time-limited access to your webhook-stored credentials.
Raw Credential Brokering
Store GCP service account keys and let your webhook mint short-lived access tokens.
Webhook Mode Deep Dive
Architecture, kill switch, refresh options, and zero-knowledge properties.